Updating the firmware on your Pioneer NEX using an iPhone might seem intimidating at first, but it's a straightforward process once you know the steps. You'll need to make sure both devices are on the same Wi-Fi network and that you've got the Car AV Assist app installed and up-to-date. Before you begin, it's essential to back up your settings, either through the app or directly from the NEX settings menu. With these preparations in place, you're ready to check for new firmware updates. So, what's next in the update process? Let's explore the remaining steps to make certain your system runs smoothly.
Compatibility Check
Before updating the firmware on your Pioneer NEX using an iPhone, it's important to check compatibility to avoid any issues. Start by verifying that your specific Pioneer NEX model supports firmware updates through the Car AV Assist app. Not all models have this capability, so confirming this can save you time and potential frustration.
Next, visit the official Pioneer website to check the latest firmware version available for your NEX model. This step is significant because attempting to update with an outdated firmware version can lead to complications. Make sure to download the correct firmware that matches your device model.
Additionally, confirm that your iPhone is running a compatible version of iOS that supports the Car AV Assist app. Firmware updates may require specific iOS versions, and newer updates can change these compatibility requirements. It's wise to keep both your iPhone's iOS and the Car AV Assist app updated to their latest versions.
For a smooth update process, verify that your Pioneer NEX device and iPhone are connected to the same Wi-Fi network. This connection is crucial for the Car AV Assist app to communicate effectively with your NEX device, facilitating a seamless firmware update.
Backup Settings and Data
Before updating your Pioneer NEX firmware, back up your settings and data to avoid losing personalized configurations. Access the settings menu on your NEX device to create a backup, or use the Car AV Assist app on your iPhone for a smoother process. Confirm the backup is saved either to a USB flash drive or your iPhone before proceeding.
Backup Data Process
Safeguarding your personalized settings and data is crucial when updating the firmware on your Pioneer NEX. Before diving into the firmware update, you'll need to follow a simple backup data process to guarantee none of your configurations or preferences are lost. Start by accessing the settings menu on your Pioneer NEX unit. Look for the option to export settings, and select it. You'll need a USB flash drive to save your backup.
Make sure to include all significant data in your backup, such as contacts and music playlists, especially if they're linked to your smartphone. This guarantees you don't lose any essential information during the update. Additionally, keeping a record of your current settings, including audio preferences and radio presets, will help you restore them quickly if needed.
It's a good idea to regularly back up your device data, not just when updating firmware. This practice creates a safe recovery point, protecting you against potential data loss. By following this backup data process, you can proceed with the firmware update confidently, knowing your settings and data are securely saved.
Save Personalized Settings
Once you've completed the backup data process, the next step is to save your personalized settings on the Pioneer NEX. Start by steering to the settings menu on your Pioneer NEX unit. Look for the option to back up your settings. This feature allows you to save your audio preferences, Bluetooth connections, and other configurations.
To make this process seamless, use the Car AV Assist app on your iPhone. Open the app and follow the prompts to transfer your current settings from your Pioneer NEX device. This guarantees that all your personalized configurations are stored safely in the app.
Next, verify that the backup has been completed successfully. Check within the Car AV Assist app to confirm that your settings have been saved. This step is essential as it makes restoring your settings easier after the firmware update.
If you prefer, you can also back up your settings to a USB stick. Insert the USB stick into your Pioneer NEX unit, access the backup settings option, and save your configurations to the USB stick. This gives you an additional layer of security.
Download the Firmware
To download the firmware, start by confirming that the Car AV Assist app is installed on your iPhone. This app is indispensable for managing your Pioneer NEX unit and performing the firmware update. Follow these steps to guarantee a smooth process:
- Establish Connection: Connect your iPhone to the Pioneer NEX unit via Wi-Fi and Bluetooth. This step is essential for a stable connection during the firmware update process.
- Open the App: Launch the Car AV Assist app on your iPhone. Navigate to the firmware update section within the app. This area will display the latest available firmware version for your Pioneer NEX device.
- Download Firmware: Verify your iPhone has a stable internet connection. Within the firmware update section, initiate the download. The app will handle the download directly, simplifying the process and ensuring you get the correct version.
Throughout this process, make sure your iPhone remains connected to the internet and the Pioneer NEX unit. A stable connection is critical to prevent any interruptions that could cause issues with the firmware update.
After the download is complete, follow any on-screen instructions provided by the Car AV Assist app. These instructions will guide you through the remainder of the firmware update process, confirming your Pioneer NEX unit is updated correctly.
Transfer Firmware to USB
Before you can update your Pioneer NEX unit, you need to transfer the downloaded firmware to a USB drive. Start by downloading the latest firmware file from the official Pioneer website onto your computer. Unfortunately, you can't use your iPhone to directly transfer files to a USB drive, so a computer is necessary for this step.
Next, you'll need a USB flash drive. Confirm it's formatted to either FAT32 or NTFS, with a minimum capacity of 512 MB. This guarantees compatibility with your Pioneer NEX device. If you're unsure how to format your USB drive, you can do so through your computer's file management system.
Once your USB drive is correctly formatted, connect it to your computer. Locate the downloaded firmware file on your computer and transfer it to the USB drive. It's vital that there are no other files on the USB drive to prevent any potential conflicts during the update process. Simply drag and drop or copy and paste the firmware file onto the USB drive.
After the transfer is complete, safely eject the USB drive from your computer. This step guarantees that the file is fully written and prevents data corruption. Now, insert the USB drive into the designated USB port on your Pioneer NEX head unit.
Initiate Firmware Update
Initiating a firmware update on your Pioneer NEX device can be straightforward with the right tools at your disposal. To smoothly initiate the process using your iPhone, follow these steps to guarantee everything goes as planned.
First, download the Car AV Assist app from the App Store. This app is essential for managing the firmware update process. Once installed, make sure your iPhone is connected to your Pioneer NEX unit via both Wi-Fi and Bluetooth. This dual connection is vital for seamless communication between your devices.
Here's a quick rundown of what you need to do next:
- Open the Car AV Assist App: Navigate to the firmware update section within the app. This is where you can check if there are any new firmware versions available for your Pioneer NEX model.
- Check Compatibility: Confirm that your specific Pioneer NEX model supports firmware updates through the Car AV Assist app. Compatibility is necessary, as not all models may be supported.
- Follow On-Screen Prompts: The app will guide you through downloading and installing the latest firmware version. Pay close attention to each prompt to guarantee the update process proceeds without any hitches.
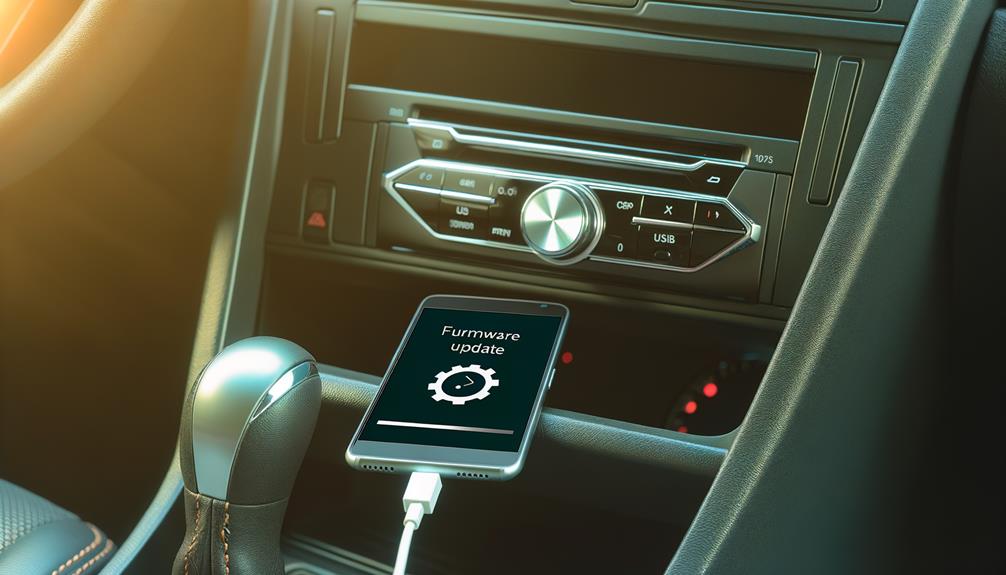
Once you've initiated the update, the app will handle downloading and installing the firmware onto your Pioneer NEX device. This step may take a few minutes, so guarantee your iPhone remains connected and don't interrupt the process.
After the update completes, your Pioneer NEX device should be running the latest firmware version. However, don't forget to double-check the firmware version in your device's settings menu to confirm the update was successful.
Verify Update Success
Verifying the success of your firmware update is essential to confirm your Pioneer NEX device functions as expected. Start by checking the firmware version in the settings menu. Navigate to the settings, locate the firmware information section, and verify it matches the latest version you downloaded and installed. This step confirms that the update process was completed correctly.
Next, test all functionalities of your device. Verify that Apple CarPlay and Android Auto operate smoothly without any issues. These features are critical for a seamless user experience, and any malfunction could indicate an incomplete or faulty update.
If you notice any settings that were lost during the update, restore them from a previously backed-up configuration. This verifies your device retains your customized preferences and runs efficiently. It's a good practice to always have a backup before initiating any firmware updates.
Monitor your Pioneer NEX for any error messages or irregular behaviors post-update. Unusual activities or errors might signify a problem with the firmware installation. Keep an eye out for any signs that something didn't go as planned.
If you encounter any difficulties or error messages, note them down. While this guide doesn't cover troubleshooting, being aware of specific issues can help when you seek assistance. The Pioneer support site is a valuable resource for detailed troubleshooting tips and explanations for specific error codes related to your firmware update.
Troubleshoot Issues
Encountering issues during or after a firmware update on your Pioneer NEX can be frustrating, but troubleshooting can help resolve them efficiently. Here are some steps to help you address common problems and guarantee a smooth update process.
First, if your Pioneer NEX device doesn't recognize your iPhone, make sure both Wi-Fi and Bluetooth are enabled on your phone. Also, confirm that the Car AV Assist app is properly installed and up to date. Sometimes, a simple app update can resolve recognition issues.
Second, if the firmware update process stalls or fails, restart both the Pioneer NEX device and your iPhone. Once both devices are back on, attempt the update again through the Car AV Assist app. Restarting often resolves minor glitches that can interrupt the update process.
Third, if the app indicates that the firmware file is corrupted or invalid, double-check that you've downloaded the latest firmware version from the Pioneer website. Verify you followed any specific installation instructions for iPhone users. This can prevent errors due to incorrect or incomplete downloads.
Common Issues and Solutions
- Device Not Recognized: Guarantee Wi-Fi and Bluetooth are on, and the Car AV Assist app is updated.
- Update Stalls/Fails: Restart both devices and retry the update process.
- Firmware File Issues: Confirm the latest version is downloaded and follow specific instructions for iPhone.
Frequently Asked Questions
How to Update Pioneer Nex Firmware?
To update your Pioneer NEX firmware, guarantee firmware compatibility, then download the Car AV Assist app. Connect via Wi-Fi and Bluetooth, follow prompts in the app, and verify the new firmware version in settings post-update. Backup first.
How to Update Firmware on Pioneer?
To update firmware on a Pioneer device, guarantee firmware compatibility first. Download and install the required app, connect your device via Wi-Fi and Bluetooth, and follow the on-screen prompts to complete the update. Verify the firmware version afterward.
How to Do a Firmware Update on Phone?
To update firmware on your phone, go to settings, check for software updates, and follow the on-screen prompts. New firmware features enhance performance and security, ensuring your device runs smoothly. Don't forget to connect to Wi-Fi.
How Do I Connect My Iphone to My Pioneer Radio?
To connect your iPhone to your Pioneer radio, first enable Bluetooth on both devices. Navigate to your iPhone's Bluetooth settings, select the Pioneer device, and confirm the pairing code. You can now enjoy seamless Bluetooth pairing and connectivity.
Conclusion
In summary, updating your Pioneer NEX firmware using an iPhone is straightforward. Confirm compatibility, back up your settings, and use the Car AV Assist app to download the firmware. Transfer it to a USB, initiate the update, and verify its success. If you encounter any issues, consult the troubleshooting guide. Keeping your firmware up-to-date guarantees peak performance and access to new features. Always maintain a stable connection throughout the process for a smooth update.



Leave a Reply