Imagine a scene where your video clips unfold like a rapid-fire slideshow, moments zipping by in an instant. You might be wondering how to achieve that effect on your iPhone without too much hassle. Whether you want to enhance your travel footage or create a dynamic presentation, knowing the right tools and techniques can make all the difference. The good news is, it's simpler than you think, and there are multiple options at your disposal. So, let's explore the methods that can help you transform your videos into a fast-paced experience.
Understanding Video Speed Adjustment
When you want to adjust the speed of a video, it's vital to grasp the basics of video speed adjustment. Understanding how video playback works is the first step in mastering speed effects. Fundamentally, video speed can be altered to create various effects—speeding it up can make an action-packed sequence more thrilling, while slowing it down can emphasize emotional moments.
To get started, you should know that video speed is typically measured in frames per second (fps). When you increase the fps, the video plays back faster, which is useful for creating a dynamic feel. Conversely, reducing the fps can create a slow-motion effect that adds drama to your footage. Each adjustment changes the viewer's perception, so it's important to reflect on the mood you want to convey.
Additionally, remember that speed effects can also affect audio. When you speed up a video, the audio pitch might increase, creating a comical or unnatural sound. Similarly, slowing down a video can lead to audio distortion. To maintain a professional quality, you may need to adjust the audio separately.
It's also helpful to experiment with different speed settings. Some apps allow you to fine-tune the speed, offering options like 0.5x for slow-motion or 2x for fast playback. By familiarizing yourself with these adjustments, you'll be better equipped to create engaging videos that resonate with your audience.
Using Imovie App
To speed up a video using the iMovie app, you'll first need to open your project. Once you're in, adjusting the speed settings is a breeze. Finally, don't forget to export your final video to save your changes!
Open Imovie Project
Opening an iMovie project on your iPhone is a straightforward process that sets the stage for enhancing your video. First, launch the iMovie app from your home screen. Once it's open, you'll see your existing projects, and if you haven't created one yet, tap the "+" button to start a new project. This is where iMovie features come into play, allowing you to choose between a Movie or a Trailer format—select what fits your needs best.
After creating or selecting a project, you'll be taken to the editing interface. Here, project organization is key. You can easily add clips from your library, rearrange them, or delete any unwanted footage. Take a moment to familiarize yourself with the interface; it's designed to be user-friendly, so you won't feel overwhelmed.
Once you've organized your clips, you're ready to immerse yourself in editing. This initial step is essential as it helps you lay the groundwork for the adjustments you'll make, including speeding up your video later on. So, get your project set up and get ready to release your creativity!
Adjust Speed Settings
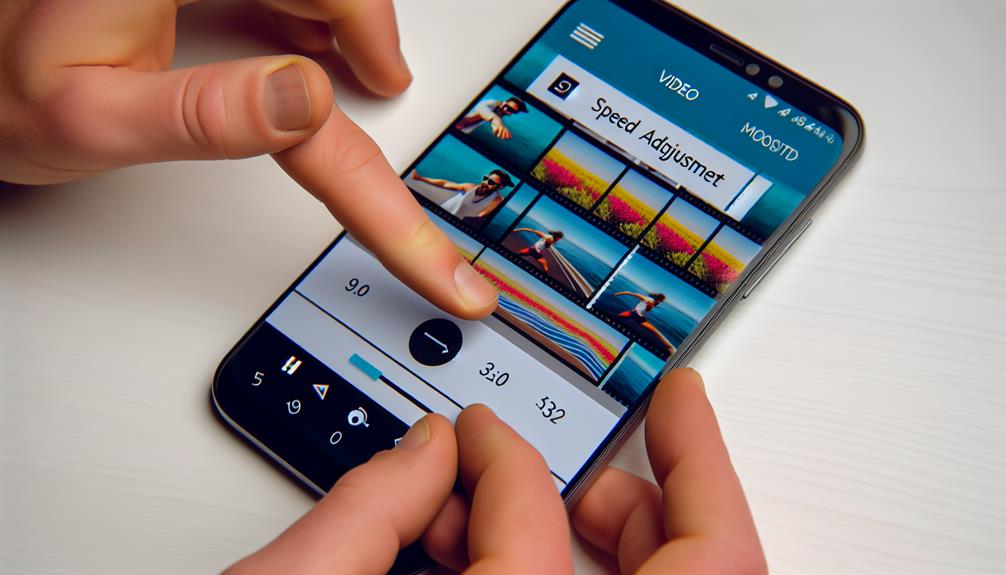
Adjusting the speed settings in iMovie is a simple yet powerful way to enhance your video. You can easily manipulate the pace of your clips using various speed adjustment techniques. Start by selecting the video clip you want to modify. Once selected, tap the speed icon that resembles a gauge, typically found at the bottom of the screen.
From here, you'll see a slider that allows you to speed up or slow down the video. Dragging the slider to the right increases the speed, while dragging it to the left reduces it. You can choose from several speed options—2x, 4x, or even more—depending on how fast you want your video playback options to be.
If you want more precision, you can manually enter a speed value. This flexibility enables you to achieve the exact pacing that fits your creative vision. Remember to preview your changes to verify the speed adjustment complements the overall flow of your project. With these techniques, you can turn an ordinary video into an engaging and dynamic experience for your viewers.
Export Final Video
After you've fine-tuned the speed settings in iMovie, the next step is exporting your final video. This is where you'll get to choose how you want to save it, ensuring it fits your needs perfectly. iMovie offers various export settings that allow you to select different video formats, whether you want to keep it high-quality or optimize it for sharing online.
Here's how to do it:
- Tap on the "Done" button to finish editing.
- Select the "Share" icon and then choose "Save Video."
- Pick your desired video format and resolution.
When exporting, keep in mind that different video formats will affect the quality and file size. If you're planning to share the video on social media, you might want to choose a format that balances quality and size for quicker uploads.
Once you've made your selections, hit "Export" and let iMovie do its magic. In just a few moments, you'll have your sped-up video ready to share or save to your camera roll. Enjoy showcasing your creativity!
Speeding Up Videos in Photos App

Speeding up a video in the Photos app on your iPhone is a quick way to enhance your footage and make it more dynamic. This built-in feature allows you to adjust video playback speed easily, making your videos more engaging. Let's walk through the steps and some tips on how to maximize the editing tools available.
To get started, open the Photos app and select the video you want to edit. Tap on "Edit" in the upper right corner. Once you're in the editing interface, look for the speed adjustment option. You can choose to speed up your video by selecting the desired speed multiplier.
Here's a simple table to help you understand the speed options:
| Speed Option | Effect on Video |
|---|---|
| 1x | Normal playback |
| 2x | Doubles the speed |
| 4x | Quadruples the speed |
| Custom | Adjust to your preference |
After you've selected your speed, preview the changes to guarantee it fits your vision. If you're satisfied, just tap "Done" to save your edits. Remember that speeding up a video can create a fun and lively feel, perfect for social media or personal projects. Experiment with different speeds to find what works best for your footage! With these editing tools, you're sure to give your videos a fresh twist.
Exploring Third-Party Apps
If you're looking for more options to speed up your videos, third-party apps can be a game changer. Many popular video editing apps offer user-friendly interfaces that make editing a breeze, plus they often come with advanced speed adjustment features. Let's explore some of the best choices out there to enhance your video editing experience.
Popular Video Editing Apps
When it comes to video editing on your iPhone, third-party apps can offer powerful features that built-in tools might lack. With the rise of video editing trends, choosing the right app can make a significant difference in your editing experience. Here's a quick app comparison of some popular options you might want to contemplate:
- iMovie: A user-friendly option that's perfect for beginners, iMovie lets you easily speed up videos and add music or text.
- LumaFusion: This professional-grade app offers advanced editing capabilities, allowing you to manipulate video speed with precision.
- KineMaster: Known for its intuitive interface, KineMaster provides a range of features, including multi-layer editing and speed adjustments.
Each of these apps brings unique features to the table, helping you create stunning videos with ease. Depending on your needs and editing style, one app may stand out more than the others. Don't hesitate to explore these options to find the best fit for your video projects—your creativity will thank you!
User-Friendly Interface Options
While exploring the world of video editing apps, you'll find that user-friendly interfaces can greatly enhance your editing experience. Apps designed with an intuitive design make it easy to maneuver through various functions, allowing you to speed up your videos with just a few taps. This simplicity is key, especially when you're in a hurry or new to video editing.
Many third-party apps offer accessibility features that cater to different user needs. For instance, options like voice commands or adjustable text sizes can make maneuvering the app more comfortable. Look for apps that emphasize ease of use, so you can focus on your creativity rather than getting bogged down by complicated controls.
Additionally, some apps provide tutorials or guided tours, ensuring you feel confident as you edit. The right app can turn a challenging task into a fun and engaging process. Remember, the goal is to find a tool that allows you to quickly and effectively speed up your videos without feeling overwhelmed. With the right user-friendly app, you'll be on your way to creating impressive videos in no time!
Advanced Speed Adjustment Features
After finding a user-friendly app that simplifies the video editing process, it's time to explore advanced speed adjustment features that can elevate your editing game. Third-party apps can provide you with the tools to experiment with various time lapse techniques and fine-tune your video's frame rate for a professional finish.
Here are some features to look for in these apps:
- Variable Speed Control: Adjust speed at different points in your video to create dynamic effects.
- Smooth Frame Rate Adjustments: Guarantee your video maintains high quality while speeding up, avoiding choppy playback.
- Custom Time Lapse Settings: Set specific intervals for time lapse effects, allowing for creative storytelling.
Utilizing these advanced features can transform your videos from ordinary to extraordinary. For instance, you might want to highlight a fast-paced activity or simply condense long footage into an enchanting clip. With just a few taps, you can achieve a seamless blend of speed and creativity. So, plunge into those third-party apps and release your inner filmmaker by mastering speed adjustments!
Exporting Your Edited Video

Once you've finished editing your video, it's time to export it so you can share your masterpiece. The export process allows you to save your edited video in a suitable format while adjusting export settings to match your needs. Whether you want to upload it to social media or keep it for personal use, understanding video formats is essential.
Here's a quick guide to help you choose the right export settings:
| Video Format | Best For |
|---|---|
| MP4 | Social media and sharing |
| MOV | High quality and editing |
| AVI | Compatibility across devices |
When you're ready to export, follow these steps. First, tap the export button in your video editing app. You'll likely see various options to choose from. Select your preferred video format based on your intended use. For instance, if you're sharing on platforms like Instagram or Facebook, MP4 is often the best choice.
Next, adjust your export settings. You might want to change the resolution, frame rate, or quality depending on where you plan to upload your video. Higher resolutions provide better quality but can result in larger file sizes.
After you've made your selections, hit the export button and wait for the process to complete. Once it's done, you can easily share your video or save it to your camera roll. Enjoy showcasing your edited masterpiece!
Tips for Best Results
To achieve the best results when speeding up a video on your iPhone, it is crucial to focus on a few key techniques. First and foremost, make sure to maintain the video clarity throughout the editing process. If the video becomes too pixelated or blurry, it can detract from the overall viewing experience. Here are some tips to help you achieve the best quality:
- Check your original resolution: Always start with the highest resolution possible. This guarantees that even after speeding up the video, it retains its original quality.
- Adjust audio synchronization: Speeding up a video can often throw off the audio. Pay attention to how the audio aligns with the visuals, and consider using tools to adjust it if necessary. This will keep your video engaging and easy to follow.
- Preview your edits: Before finalizing the video, preview it multiple times. This allows you to catch any issues with clarity or synchronization, guaranteeing that your final product meets your expectations.
Sharing Your Speedy Video

Sharing your speedy video is a breeze with your iPhone's intuitive features and a few simple steps. Once you've sped up your video, you'll want to share it with your friends and followers on social media. Here's how you can do that effectively:
- Open the Photos app and select your edited video.
- Tap the share icon (the square with an arrow pointing up).
- Choose your preferred social media platform, like Instagram, Facebook, or TikTok.
- Add any captions or hashtags to enhance your post.
- Hit "Post" and let the world see your creative work!
To help you decide where to share, here's a quick comparison of popular platforms for video sharing:
| Platform | Best For |
|---|---|
| Visual storytelling | |
| Broader audience | |
| TikTok | Short, engaging clips |
| YouTube | Long-form content |
| Quick updates |
Each platform has its unique audience and style, so think about where your video will resonate the most. Whether you're showcasing a funny moment, a tutorial, or a creative project, speeding up your video adds excitement and keeps viewers engaged.
Frequently Asked Questions
Can I Speed up a Video Without Losing Audio Quality?
Yes, you can speed up a video without losing audio quality. Utilize editing apps designed for audio preservation, ensuring your sped-up video maintains clarity. Experiment with different apps for the best results tailored to your needs.
What Video Formats Can I Speed up on Iphone?
You can speed up almost any video format on your iPhone, but not every format's created equal! For the best video editing experience, stick to format compatibility with common types like MP4, MOV, and AVI.
Is There a Limit to How Fast I Can Speed up a Video?
Yes, there's a limit to how fast you can speed up a video. Most apps allow you to adjust playback speed within specific speed settings, typically ranging from 2x to 4x, depending on the platform.
Will Speeding up a Video Reduce Its Resolution?
Speeding up a video doesn't inherently reduce its resolution, but it can affect video quality depending on the editing tools you use. Always check settings to guarantee you're maintaining the best quality possible during editing.
Can I Revert a Sped-Up Video Back to Normal Speed?
You can't unscramble the eggs once a video's sped up. However, in video editing, you have playback options to revert to normal speed before saving. Just remember to save your original file first!
Conclusion
In the world of video editing, speeding up your clips is like adding a turbo boost to a car—suddenly, your footage races ahead with energy and excitement. Whether you use iMovie, the Photos app, or a third-party tool, you've got the power to transform your videos. Don't forget to export and share your creation, letting others enjoy the thrill of your speedy edits. With just a few taps, you can turn ordinary moments into vibrant highlights!


Leave a Reply